
Lately I've been enjoying the time-consuming process of creating repeating patterns out of my watercolor paintings. I'd like to share the process of creating my most recent pattern with you, starting with an arguing couple in a public park and ending in a poppy pattern.
On a really beautiful and sunny day in Reykjavik, I walked to the nearby botanical garden to paint. I was going to paint some small blue flowers, but an annoying arguing couple decided that the botanical garden park bench would be a great place to work out their relationship issues. I moved away from their argument and found a flower that matched my shirt. Serendipity? Yes.
Then, a few weeks later, I started to paint a pattern idea in my sketchbook while sitting at a lovely cafe in the botanical garden with an illustrator friend who was here for a visit. I just loved how the reddish-orange in my portable little watercolor set was already the perfect poppy color, so it was easy to start a pattern. I referenced my earlier painting as I made up this winding pattern.
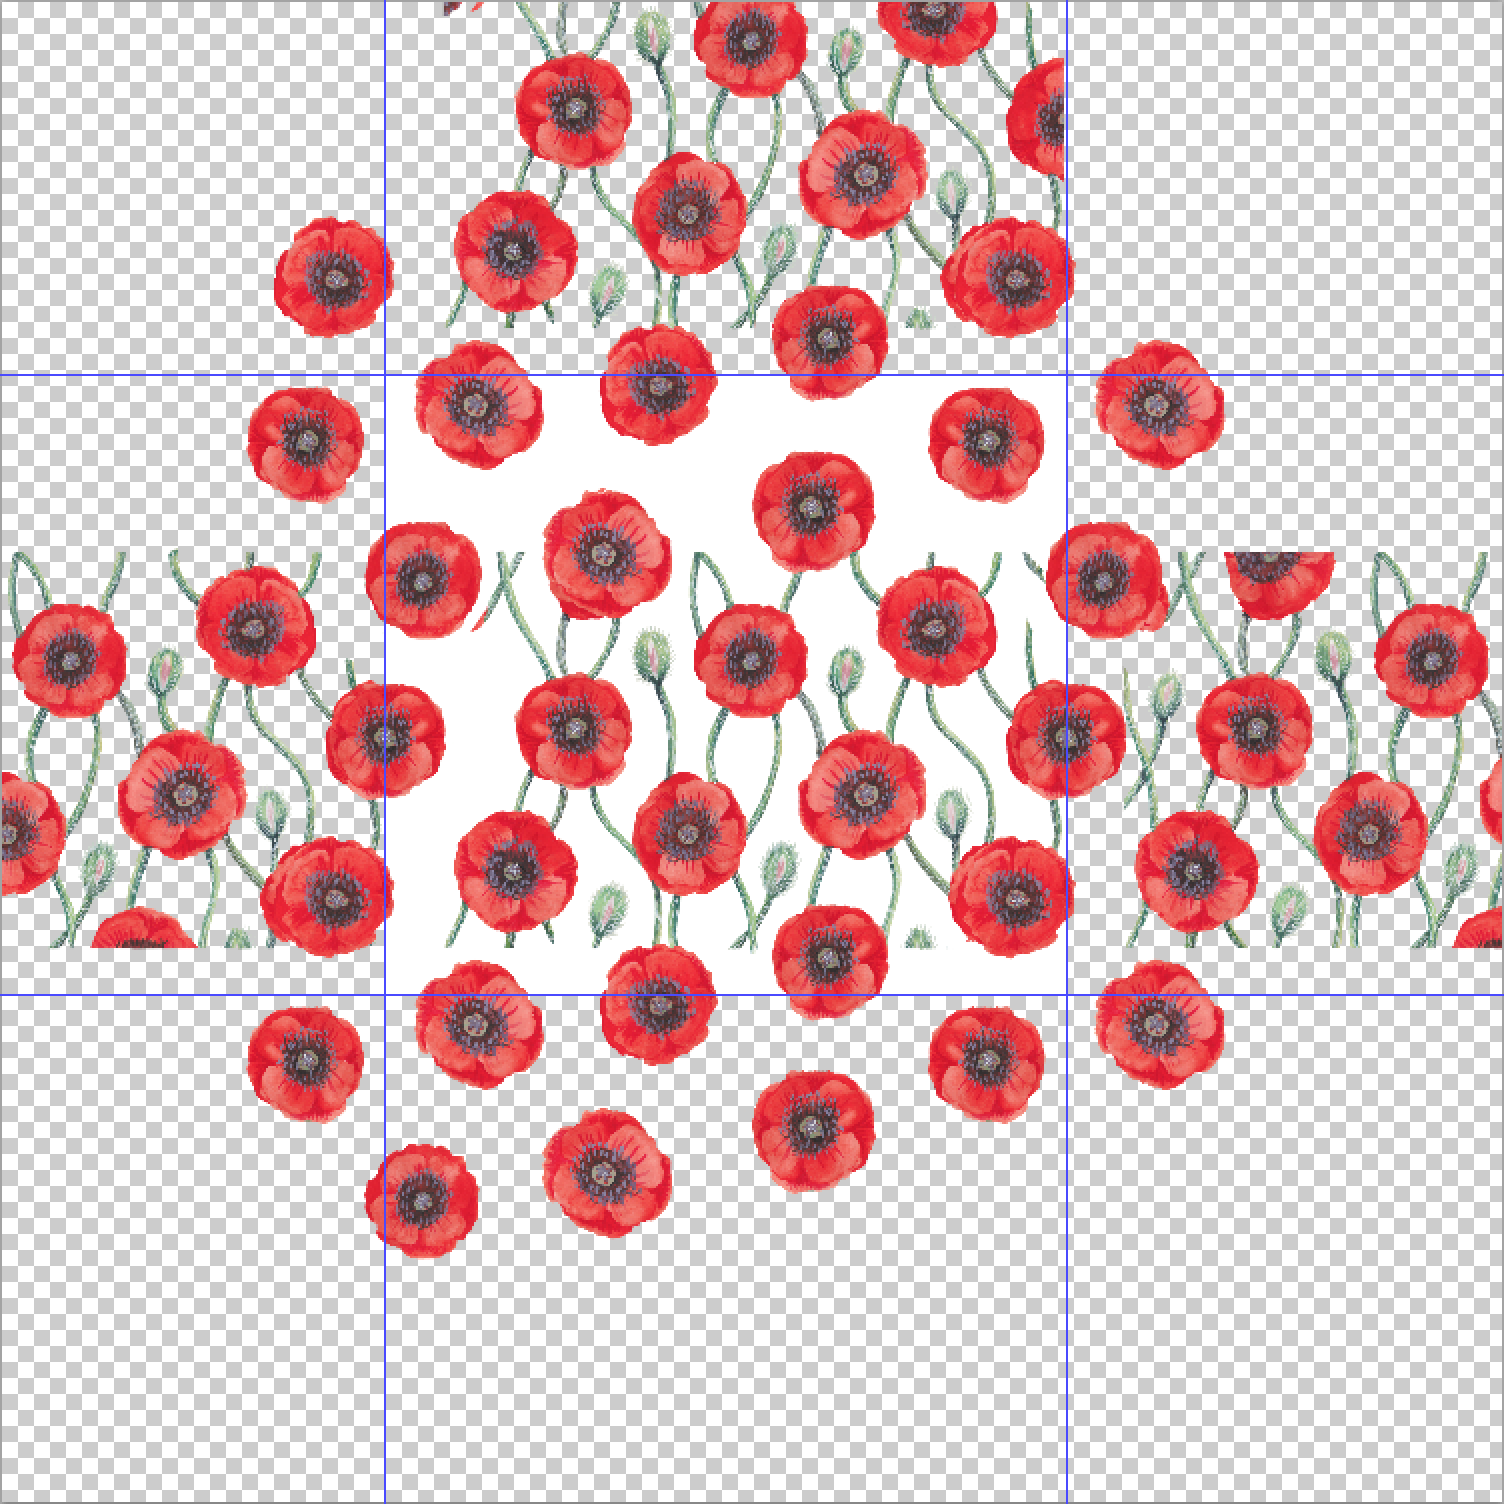
Of course, this painted pattern idea was not a repeating pattern, and it would require some work to make it into one. I scanned the painting and started to work in photoshop, creating a grid and first and foremost figuring out where the flowers needed to be to make a nice repeat. I erased the paper background because the shading and texture in paper is not easy to make look seamless in a repeat pattern.
The way I was taught to create patterns in photoshop is by creating a grid of sorts. Really, any rectangle or square will do. And then make sure that the edges line up. The top needs to line up with the bottom of that rectangle and the right side needs to line up with the left side. So the focus is on the edges, not the middle. But for a floral pattern like this one, a visual balance is really important. I needed to be sure that the flowers were seemingly equidistant from each other. I didn't want one flower to take your focus from the others. I wanted it to appear evenly spread out.
I cut out some of the flowers and repeated them on individual photoshop layers and created these guidelines to see where a natural repeat would be. Then I created my rectangle on a separate layer. Then I began the long and tedious process of copying and dragging items from one edge to the other, along with the rectangle, so I can be sure these edges line up perfectly. I started with the flowers and then I needed to make the stems and buds match up on the edges and appear evenly distributed throughout the pattern. This is not a quick process, but if you are someone who enjoys tinkering, this is quite enjoyable.
When I feel like I'm getting close, I test my pattern to see how well it repeats. I create a duplicate document, crop the image at the rectangle, flatten the image, select the image, and define it as a pattern (Edit > Define Pattern...). Then I can open a new document and make it large and fill it with my newly created pattern. Any big mistakes will be obvious immediately, and the pattern can be closely inspected so you can tell where an improvement might need to be made.
Click on one of the 5 thumbnail images below to page through the process in a lightbox.


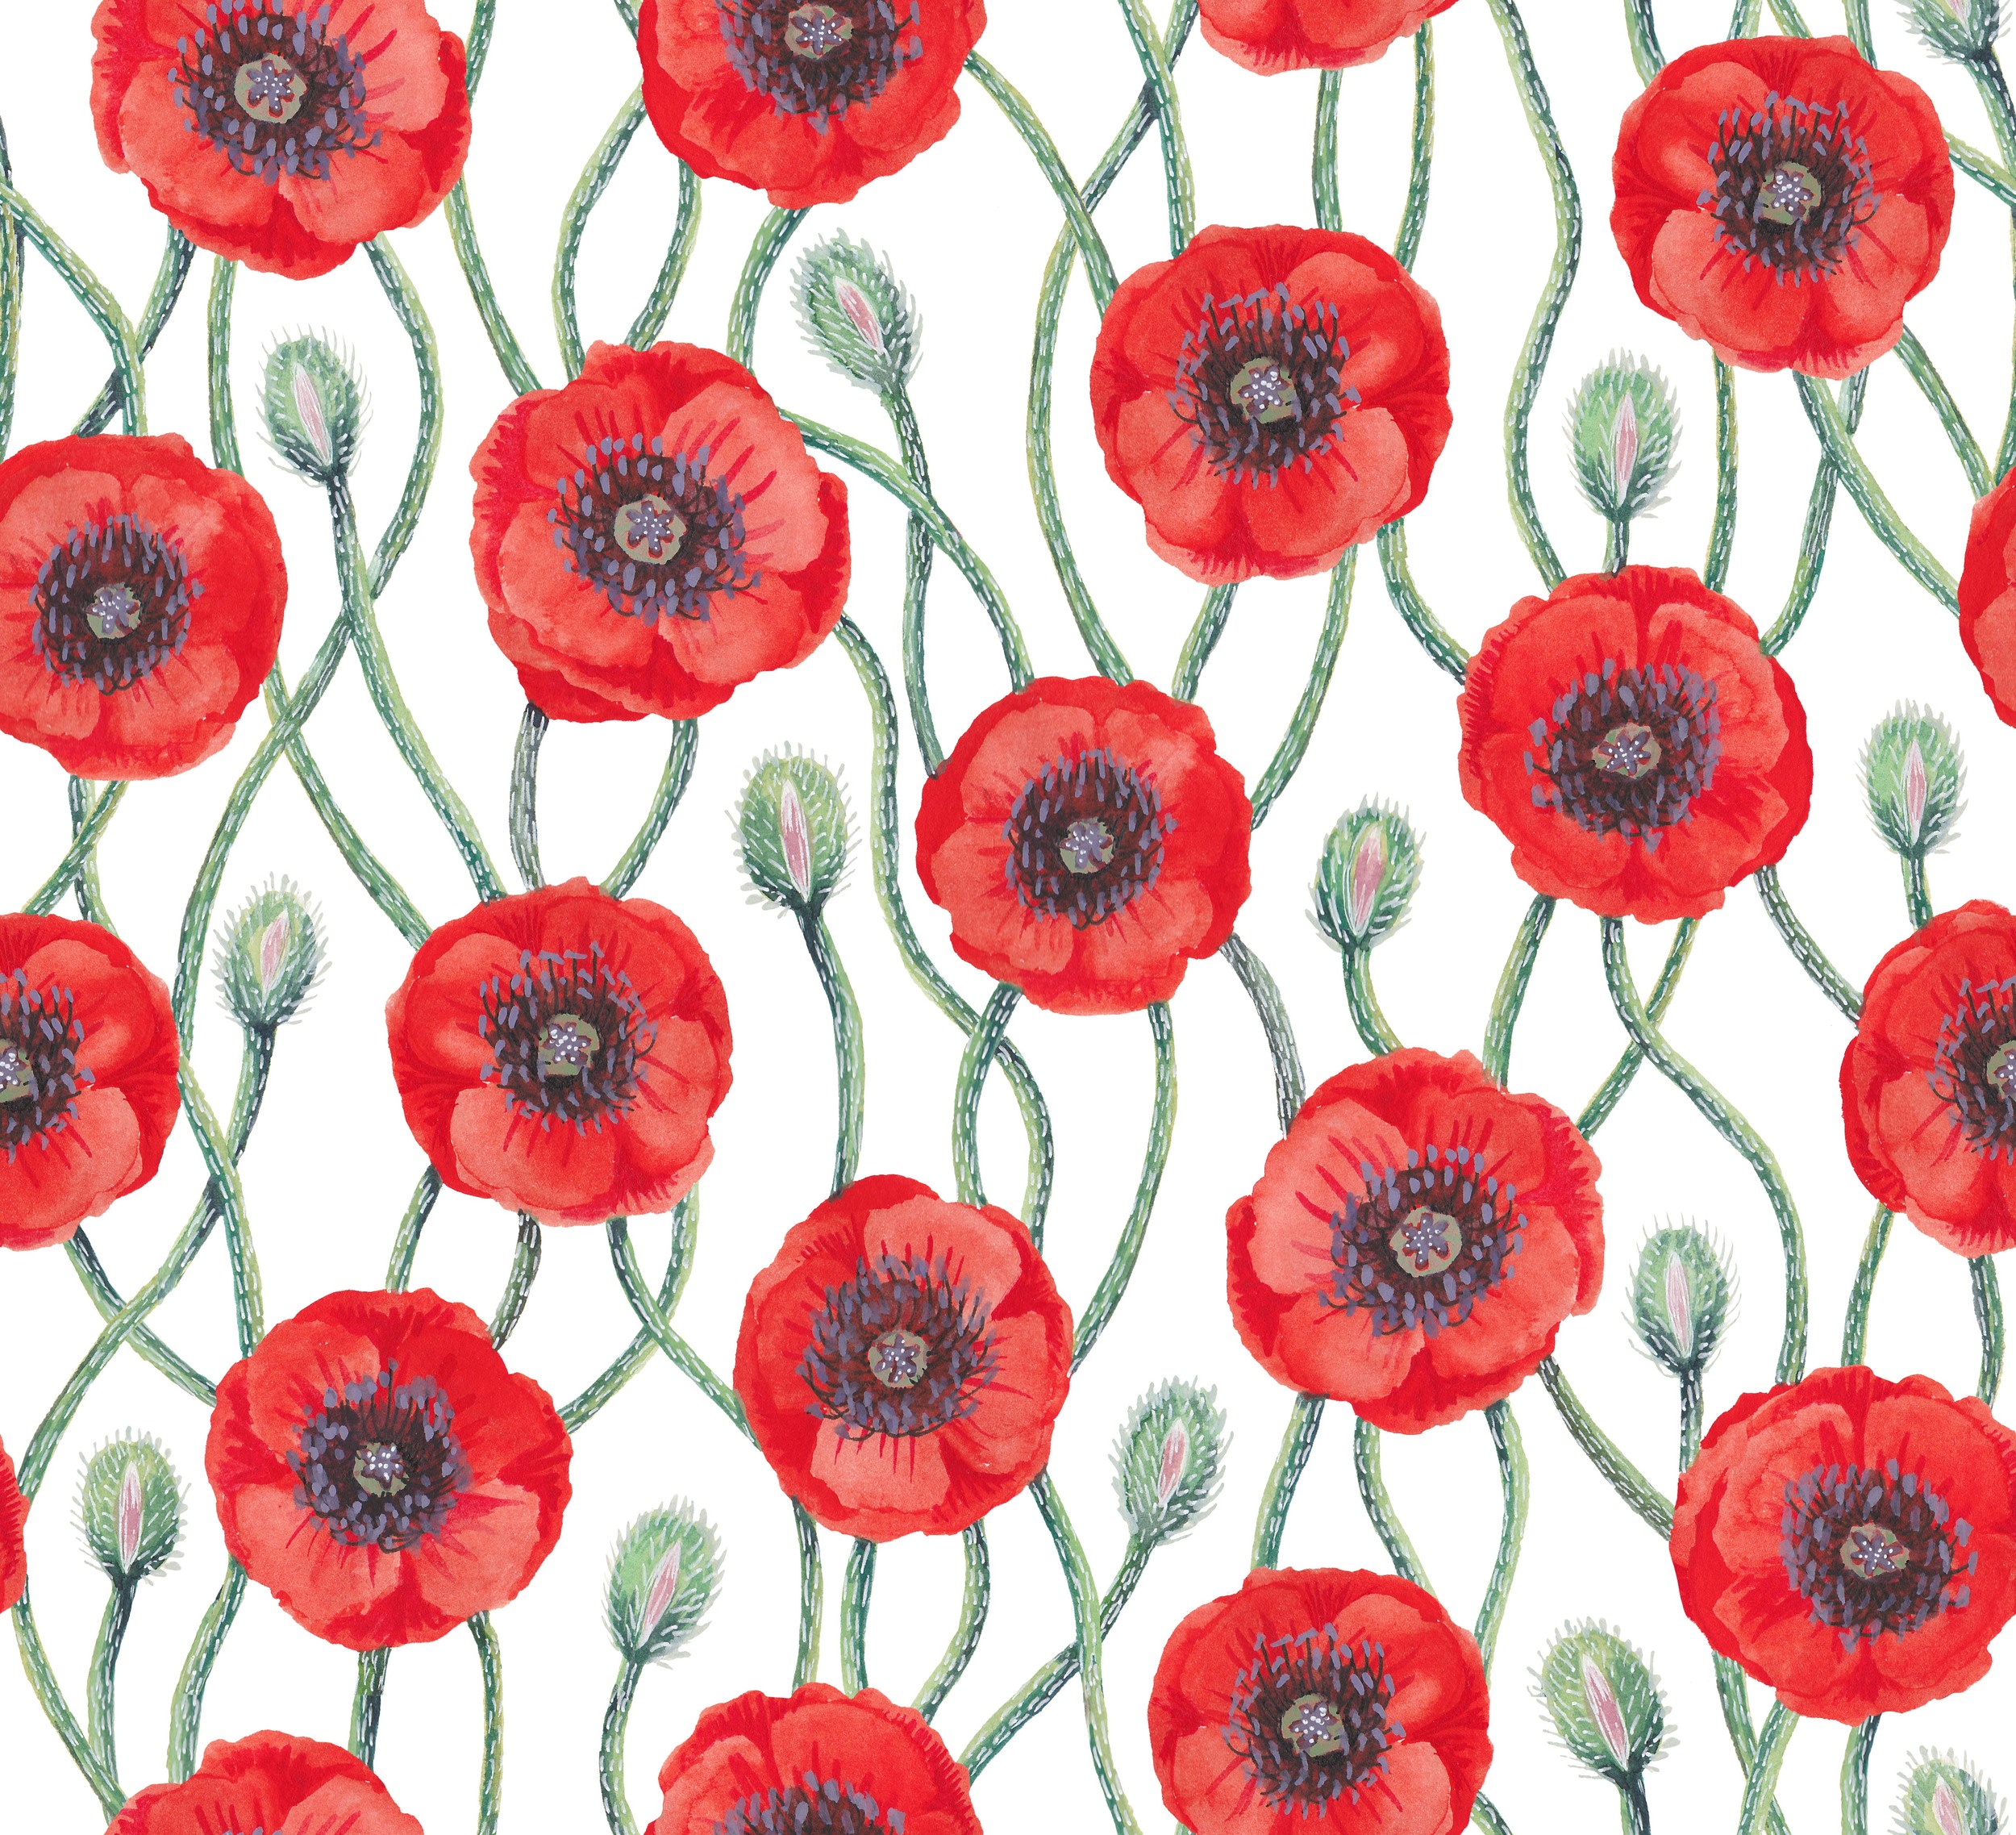
Before wrapping up my pattern, I wanted it to have the same sort of colors as my original painting. Scanning doesn't always give the most accurate colors, so this kind of color adjustment is almost always required. I adjusted the poppy color from the red of the scan to the reddish-orange of the painting. And I added an off-white background in place of my white rectangle. The background appeared flat to me, so I added noise to the background using a filter. This helped the background to better pair with the paper texture of the painting.
I am really happy with the result. I hope you enjoyed seeing a bit of the process! Cheers!
